Upper Key Stage 2 Stone Age to Iron Age Britain
Ice Age Art

Learn about Ice Age art. Experiment with different techniques and styles as you create a coffee table book all about Ice Age art, your own decorated cave, and engraved pieces of portable art – all inspired by original Ice Age art!

Session 1 Introduction to cave paintings and engravings

Objectives

History

  • Develop a chronologically secure knowledge and understanding of British and world history.
  • Construct informed responses that involve thoughtful selection and organisation of relevant historical information.

Art

  • Learn about the great artists, in this case the anonymous artists of the Ice Age.

Lesson Planning

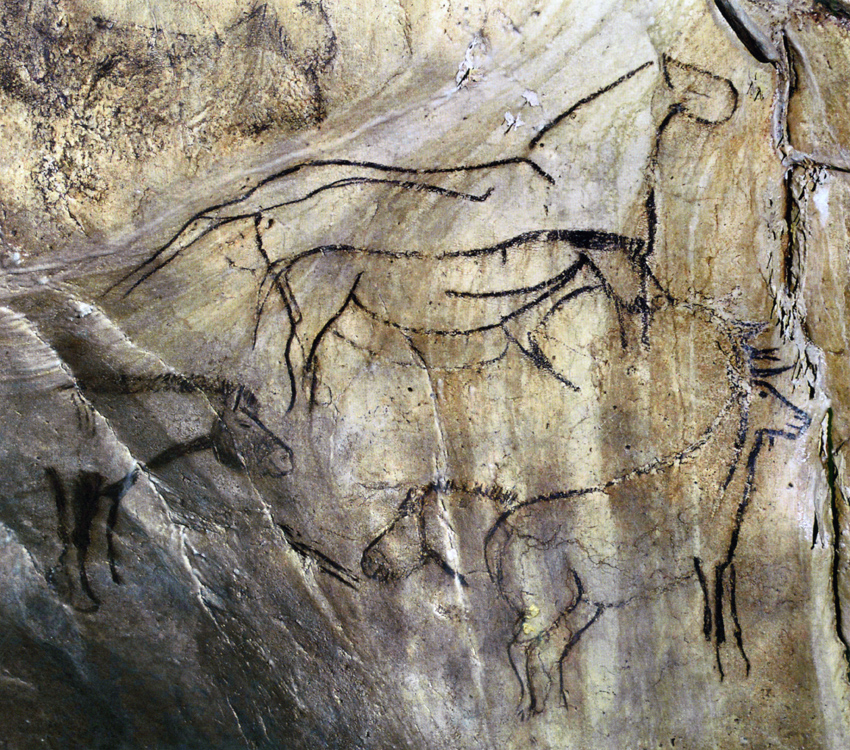
Begin to learn about Ice Age art, what it looked like and what some common subjects for artwork were. Understand the time period in which this art was created.

Teaching Outcomes:

  • To be able to place examples of Ice Age art on a class timeline.
  • To create a coffee table art book showcasing the best Ice Age art!

Children will:

  • Place cave paintings and engravings on a timeline of prehistory.
  • Explain where the paintings have been found.
  • Explain some reasons why people may have made the paintings.

Provided Resources

  • How to make a coffee table book page template

You Will Need

  • Laptops or computer suite with internet access

Weblinks

Session 2 Make a cave

Objectives

Design and Technology

  • Apply understanding of how to strengthen, stiffen and reinforce more complex structures.

Art

  • Develop techniques, including control and use of materials.

Maths

  • Identify 3-D shapes, know angles are measured in degrees: estimate and compare acute, obtuse and reflex angles, and measure them in degrees

Lesson Planning

Learn about the caves in which Ice Age art has been preserved. Make your own geodesic cave and explore a variety of techniques for making it more realistic.

Teaching Outcomes:

  • To be able to make a geodesic dome.
  • To turn a geodesic dome into a cave..
  • To understand the geometry of the geodesic dome.

Children will:

  • Make a geodesic dome.
  • Make choices on appropriate materials to use to make cave walls.
  • Try out different methods of making joins and attaching paper onto the dome.

You Will Need

  • Newspaper
  • Sticky tape
  • Cardboard
  • Sugar paper
  • Glue
  • Sand
  • Clay
  • Paint

Session 3 Make Ice Age paint for the cave

Objectives

Art

  • Improve the mastery of art and design techniques, including drawing, painting and sculpture with a range of materials. [for example, charcoal, paint, clay]

History

  • Construct informed responses that involve thoughtful selection and organisation of relevant historical information.

Lesson Planning

Find out about the different ways Ice Age people created paints and colours and experiment with a variety of techniques. Use these techniques to decorate your caves.

Teaching Outcomes:

  • To learn how to make paint from charcoal and ochre and use this paint to recreate an Ice Age painted cave.
  • To choose appropriate pieces of art to recreate to make a replica of one or more important caves.

Children will:

  • Make their own paint.
  • Try out different methods of applying paint to or engraving a surface.
  • Apply some of their knowledge about prehistoric cave paintings to their creations.

You Will Need

  • Charcoal
  • Chalk
  • Ochre coloured pastels (orange, brown, red)
  • Vegetarian suet
  • Pestle and mortar
  • Shells
  • Sticks
  • Straws
  • Feathers
  • Paintbrushes

Session 4 Research portable art

Objectives

Art

  • Learn about the great artists, in this case the anonymous artists of the Ice Age.

History

  • Construct informed responses that involve thoughtful selection and organisation of relevant historical information.

Lesson Planning

Discover a range of smaller, portable examples of Ice Age art. Learn about their materials and construction and discuss possible reasons for their form and creation.

Teaching Outcomes:

  • To add to our coffee table art book, showcasing the best portable Ice Age.
  • To be able to place examples of Ice Age art on the class timeline and understand what different sources tell us about the Ice Age.

Children will:

  • Place examples of portable cave art on a timeline of prehistory.
  • Explain where the sculptures have been found.
  • Explain some reasons why people may have made the sculptures .

You Will Need

You do not need any particular resources for this session.

Weblinks

Horse engraved on a rib bone from Creswell Crags from teachinghistory100.org
Selection of carved and engraved bones from Britain and Europe from teachinghistory100.org
Jewellery and moulded and carbed portable art from Dolni Vestonice in the Czech Republic from donsmap.com
Gallery of portable Ice Age art from Europe from bradshawfoudnation.com
Warning - some portable art shows nude women – make sure you choose suitable sculptures for your class to look at. Use the session resources if you want to avoid these.

Session 5 Make portable art

Objectives

Art

  • Improve their mastery of art and design techniques, (in this case with a focus on sculpting in different materials)

History

  • Construct informed responses that involve thoughtful selection and organisation of relevant historical information.

Lesson Planning

Explore a variety of techniques that can be used for making Ice Age style portable art. Use these techniques to create your own portable art.

Teaching Outcomes:

  • To make a piece of portable art from bone, soap or clay using wooden or stone tools.
  • To research how to create a piece of portable Ice Age art.

Children will:

  • Explain different ways that Ice Age portable art was made.
  • Create their own piece of Ice Age sculpture using one or more techniques.
  • Have an opinion about why Ice Age people made sculptures.

You Will Need

  • A number of bars of Pears soap
  • Air-drying clay or fimo
  • Sticks and stones
  • Lamb ribs

Weblinks

Animals around the end of the last Ice Age from twilightbeasts.wordpress.com
Horse engraved on a rib bone from Creswell Crags from teachinghistory100.org
Selection of carved and engraved bones from Britain and Europe from teachinghistory100.org
Jewellery and moulded and carbed portable art from Dolni Vestonice in the Czech Republic from donsmaps.com
Gallery of portable Ice Age art from Europe from bradshawfoundation.com
Warning - some portable art is of nude women – make sure you choose suitable sculptures for your class to look at. Use the portable art resource from session 4 if you wish to avoid this.

Session 6 Make an exhibition

Objectives

Art

  • Evaluate and analyse creative works using the language of art.

History

  • Construct informed responses that involve thoughtful selection and organisation of relevant historical information.

English

  • Identify the audience for and purpose of the writing, selecting the appropriate form and using other similar writing as models for their own.
  • Give well-structured descriptions, explanations and narratives in speech.

Lesson Planning

Bring together everything you have learnt to create an informative and interesting exhibition about Ice Age art.

Teaching Outcomes:

  • To select and label a piece of artwork for exhibition.
  • To prepare a tour about Ice Age art for another class.
  • To write labels for your art and lead tours around the exhibition.

Children will:

  • Evaluate their own and each other's artwork to put in an exhibition.
  • Write a label for an exhibition.
  • Prepare and conduct a tour.

You Will Need

  • Paper
  • Pencils
  • Tables / shelves / stands for displaying things on